Am a keen follower of Microsoft's SharePoint Blog and proud to provide this direct from the Microsoft Tech Community:
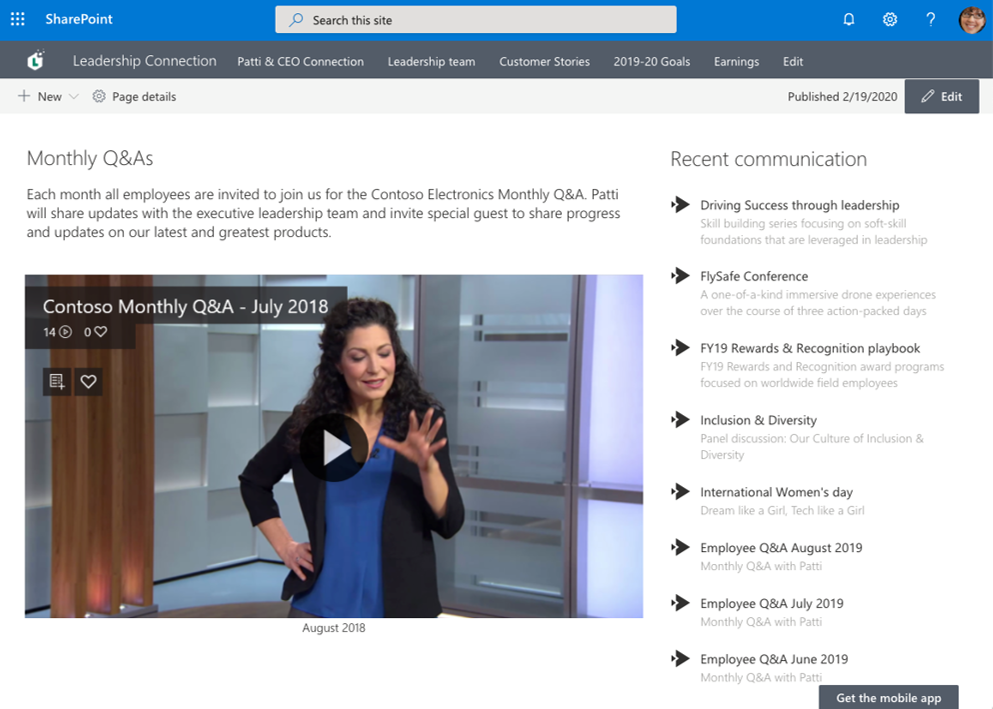
Share educational videos with your class or highlights from meeting recordings with your coworkers remotely by adding the Microsoft Stream web part to your SharePoint site. Also, learn how to share this content externally in SharePoint Files and Folders.
Read the original blog post here.
The above is kindly provided by the Microsoft Tech Community!

Am a keen follower of Microsoft's SharePoint Blog and proud to provide this direct from the Microsoft Tech Community:
In this weekly discussion of latest news and topics around Microsoft 365, hosts – Vesa Juvonen (Microsoft), Waldek Mastykarz (Rencore), are joined by Patrick Rodgers (Microsoft) – Senior Program Manager for Microsoft FastTrack, and esteemed starter/maintainer of the PnPjs open-source project.
Today’s topics: FastTrack program, evolution of SharePoint and PnPjs, and breaking change – growth through destruction, resets, and incremental performance improvements. Microsoft’s FastTrack program helps customers to deploy Microsoft cloud solutions and at present is very actively helping universities and other healthcare organizations on the COVID front-lines to leverage the cloud to advance their time-sensitive work. If you or your customer is on the front line and need to make things happen now, go to the FastTrack Portal and create an RFA.
This episode was recorded on Monday, April 6th, 2020
Got feedback, ideas, other input – please do let us know!
The above is kindly provided by the Microsoft Tech Community!
Am a keen follower of Microsoft's SharePoint Blog and proud to provide this direct from the Microsoft Tech Community:
The strength of the SharePoint community is one of the primary drivers for the platform’s success over the last 15-20 years. As the community has grown and strengthened, there has been a plethora of content available to end users and developers from Microsoft, MVPs, and bloggers of all experience levels.
The SharePoint Developer Documents (sp-dev-docs) have become the proven community model for content creation and management. This community-driven repository of content has become a valuable source for developer information and a feedback mechanism for the product groups.
We are now expanding the reach of our community‘s involvement with the Microsoft 365 Community Docs. Our goal is to harness the same community energy and the expertise of the people who are true implementers and practitioners of all aspects of Microsoft 365: the citizen developers, power users, site admins, end users, and other heroes who configure and use the platform to solve important business challenges every single day.
Join us!
We want to hear your voice and your perspective. Tell us about your real–world stories of solving business problems. Share with others how you use Microsoft 365. If you have solution for needs specific to your industry, we would love to hear it. Contribute scenarios to help others understand what possibilities are available.
We aren’t trying to replace any existing documentation. What we’ll be really excited to see is different ways you use the myriad of services across Microsoft 365 to solve your day to day problems. The inventiveness of this community is astounding; let’s lift the bushel and let our light shine ever more brightly.
We are excited to widen the scope of the effort and encourage everyone in the community to use the content as a set of resources as well as consider contributing to it. We expect the structure of the Microsoft 365 community docs to evolve over time as we receive more and more contributions from experienced practitioners who have been working with SharePoint for many years.
How do I contribute?
Want to get started? Not familiar with GitHub? This article shows you the way: Welcome to the Microsoft 365 Community Docs.
Still confused or need some help? Simply create an issue with your questions and we will work to help you out. If you see issues you can help with or have other content ideas, please submit an issue in the GitHub repo. Note: “Issues” may sound intimidating, but it’s the mechanism to provide input and feedback on the GitHub platform. When you add an issue, you can choose from several templates: Question, Article Suggestion, or Article Issue.
We believe the community-driven content model has been a tremendous success in the past and that this new set of docs will be another success for the entire community. Join us on this journey, and we will all succeed together. Remember: Sharing Is Caring!
Thanks to everyone who has already contributed! Every month on the PnP calls we will list the contributors, and you will be listed in the blog posts about the effort.
Why should I contribute? What’s in it for me?
Oftentimes, people wonder how they can become more active in the community. We hope this effort will become another “on ramp” where people can direct their energy – and this community has plenty of energy!
- If you don’t consider yourself a writer, but you have ideas for articles you wish were out there, add your ideas in to the mix.
- If you’d like some help writing something, we’ll find you someone to work with you to turn your thoughts into a valuable resource.
- If you’re a blogger and have a favorite article or two, consider contributing them to give your work a longer life.
- If you’re an MVP, why not use this as yet another way to offer the community your expertise?
- Get some recognition for what you know in the PnP calls and blog posts.
This isn’t a one-size-fits-all idea: bring your energy and we will help you figure out how you can help.
Got feedback or suggestions on this model? – Please do let us know!
The above is kindly provided by the Microsoft Tech Community!

The Microsoft Threat Protection team has been working hard to make your advanced hunting experience even more straightforward, interesting, and productive. With app & identity signals, custom detections, and charts now available on preview, your proactive threat hunting activities have never been as comprehensive and effective. Turn on Microsoft Threat Protection and sign up for previews to can start enjoying these new experiences and let us know what you think.
Hunt across domains with identity and cloud app signals
While Microsoft Threat Protection automatically flags and remediates threats, advanced hunting lets you take your response a step further by enabling you to efficiently inspect benign events that in certain contexts can be indicative of breach activity. For several months now, in Microsoft 365 security center, SecOps staff for various organizations have started hunting for clues on endpoints after receiving suspicious emails. This has been made easy and convenient by endpoint data from Microsoft Defender ATP and email data from Office 365 ATP.
Today, we’re expanding that coverage to include data from Azure ATP and Microsoft Cloud App Security with the following new schema tables:
- IdentityQueryEvents — contains data about attempts to query identity information in Active Directory using LDAP and other protocols. These events are also tracked by Azure ATP to find reconnaissance activities, including activities meant to discover critical targets on your network.
- IdentityLogonEvents — contains authentication events from Active Directory as well as monitored cloud apps and services. Use this to surface suspicious logon activities, including repetitive attempts and the use of atypical logon methods.
- AppFileEvents — covers file-related activities involving apps monitored by Microsoft Cloud App Security. This gives you coverage over attempts to handle files that might contain sensitive information as well as malicious code.

See the full list of advanced hunting schema tables
Sample scenarios you can try
With these new data sets, you can hunt for activities that happen across the cybersecurity attack chain. Check out the sample scenarios below to explore what you can do with the expanded schema.
SAMR queries to Active Directory
With IdentityQueryEvents, you can now quickly find reconnaissance activities, such as processes performing suspicious SAMR queries against users and admins in your org.
IdentityQueryEvents
| where Timestamp > ago(7d)
| where ActionType == "SamrQuerySuccess" and isnotempty(AccountName)
| project QueryTime = Timestamp, DeviceName, AccountName, Query, QueryTarget
| join kind=inner (
  DeviceProcessEvents
  | where Timestamp > ago(7d)
  | extend DeviceName = toupper(trim(@"..*$",DeviceName))
  | project ProcessCreationTime = Timestamp, DeviceName, AccountName, InitiatingProcessFileName,
  InitiatingProcessCommandLine
) on DeviceName, AccountName
| where ProcessCreationTime - QueryTime between (-2m .. 2m)
| project QueryTime, DeviceName, AccountName, InitiatingProcessFileName,
InitiatingProcessCommandLine, Query, QueryTarget
LDAP authentication with cleartext passwords
With IdentityLogonEvents, you can identify possible lateral movement activities by searching for logon attempts using compromised accounts or logons over unprotected protocols, such cleartext authentications over LDAP.
This query identifies processes that have attempted to authenticate using a clear-text password, which are typically obtained using known credential theft methods.
IdentityLogonEvents
| where Timestamp > ago(7d)
| where LogonType == "LDAP cleartext" and isnotempty(AccountName)
| project LogonTime = Timestamp, DeviceName, AccountName, Application, LogonType
| join kind=inner (
  DeviceNetworkEvents
  | where Timestamp > ago(7d)
  | where ActionType == "ConnectionSuccess"
  | extend DeviceName = toupper(trim(@"..*$",DeviceName))
  | where RemotePort == "389"
  | project NetworkConnectionTime = Timestamp, DeviceName,
  AccountName = InitiatingProcessAccountName, InitiatingProcessFileName,
  InitiatingProcessCommandLine
  ) on DeviceName, AccountName
| where LogonTime - NetworkConnectionTime between (-2m .. 2m)
| project Application, LogonType, LogonTime, DeviceName, AccountName,
InitiatingProcessFileName, InitiatingProcessCommandLine
Renaming of .docx files to .doc
With AppFileEvents, you can hunt for attempts to move and stage malicious content using cloud apps. The following query locates attempts to rename .docx file to .doc, possibly to bypass protection mechanisms and allow malicious macros to run.
AppFileEvents
| where Timestamp > ago(7d)
| where ActionType == "FileRenamed"
| join kind=inner (
  DeviceFileEvents
  | where Timestamp > ago(7d)
  | project FileName, AccountName = InitiatingProcessAccountName, DeviceName
  ) on FileName, AccountName
| where FileName endswith "doc" and PreviousFileName endswith "docx"
| project Timestamp, FileName, PreviousFileName, Application, AccountName, DeviceName
Sensitive file uploads
You can also use the AppFileEvents table to hunt for exfiltration scenarios by querying for attempts to upload sensitive files to cloud apps like SharePoint, OneDrive, or Dropbox. You can use data under SensitivityLabel in the DeviceFileEvents table to locate sensitive files. However, a simpler way would be look for a specific string in file names, like sensitive in the query below:
AppFileEvents
| where ActionType == "FileUploaded"
| where Application in ("Microsoft OneDrive for Business",
"Microsoft SharePoint Online", "Dropbox")
| where FileName contains "sensitive"
| project Timestamp, ActionType, Application, FileName, FolderPath, AccountUpn,
AccountName, AccountDomain, IPAddress, Location
| take 10
For more queries, check out the Microsoft Threat Protection query repository on GitHub.
Customize alerts and take automatic actions
Many of you might have already benefited from custom detection alerts driven by advanced hunting queries in Microsoft Defender ATP. To simplify your hunt and optimize your use of the expanded schema, we’ve delivered the same custom detection functionality to Microsoft Threat Protection.
Using advanced hunting queries, you can now automate your hunts so that you can effortlessly check fresh signals and raise alerts for new finds. Make sure you set your custom detection rules to take immediate response actions for you.
To create one, simply run a query—we used the last example above for sensitive file uploads. If you don’t have results, simulate the activity by uploading a file called sensitive.txt to OneDrive, SharePoint, or Dropbox.

After confirming that the query runs well and returns meaningful results, click Create detection rules and start customizing your detection rule.
Note: To create custom detection rules, you need to be a security administrator or a security operator. If you have Microsoft Defender ATP RBAC turned on, make sure you have the managed security settings permission.

When identifying impacted entities, the user—identified by the AccountUpn column in this example—will work since the exfiltration event does not affect specific endpoints or mailboxes. Identifying the right impacted entities helps Microsoft Threat Protection aggregate relevant alerts, correlate incidents, and target response actions.
When you save your custom detection, it will run immediately and then run again based on your preferred interval. To check for alerts, head over to the Hunting > Custom detections > [Rule name] and open the Triggered alerts tab.

Learn more about creating custom detection rules
Visualize query results
To help you extract insights from your queries and add some color to your work, we’ve added an option to view query results as a chart. Now available to all customers, the chart options currently include line, column, pie, scatter, and many other chart types. After running your query, select the right chart type that matches your data.
The line chart shown below highlights spikes in activity involving a specific file. Learn how to optimize queries to render effective charts

We hope you enjoyed learning about these new hunting experiences. Don’t forget to let us know what you think!
Stay safe and happy hunting!
– Microsoft Threat Protection Team

At Microsoft, our goal is to provide a built-in, intelligent, unified, and extensible solution to protect sensitive data across your digital estate – in Microsoft 365 cloud services, on-premises, third-party SaaS applications, and more. With Microsoft Information Protection (MIP), we are building a unified set of capabilities for classification, labeling, and protection not only in Office apps, but also in other popular productivity services where information resides (e.g., OneDrive, SharePoint Online, and Exchange Online).
Sensitivity labels are central to Microsoft Information Protection. You can apply a sensitivity label to important documents and associate it with protection policies and actions like encryption and visual marking. You can also be assured that the protection will persist with the document throughout its life-cycle. You can also associate device and privacy policies to sensitivity labels and apply sensitivity labels to sites, teams, and Office 365 groups.
You can start using sensitivity labels by allowing users to manually classify emails and documents by applying these labels based on their assessment of the content and their interpretation of the organizational guidelines. However, users can sometimes forget to apply labels or apply them inaccurately, especially in these stressful times, so you need a method that will scale with the vast amount of data you have.
To help you achieve that scale, we are announcing public preview of automatic classification with sensitivity labels for documents stored on OneDrive and SharePoint Online, and for emails in transit in Exchange Online. The public preview will begin rolling out this week. As with manual classification, you can now set up sensitivity labels to automatically apply to Office files (e.g., PowerPoint, Excel, Word, etc.) and emails based on organizational policies. In addition to having users manually label files, you can configure auto classification policies in Microsoft 365 services like OneDrive, SharePoint Online, and Exchange Online. These policies can automatically label files at rest and emails in transit based on the rules you’ve set.

Figure 1. Three different policy modes for auto-classification policies
In the SharePoint and OneDrive document library experience, as shown in the screenshot below, users can see files that are labelled by their admin’s auto classification policy by hovering over the Sensitivity column. This ensures users are made aware of how the file got labeled – either automatically or manually.

Figure 2. Document library experience in SharePoint showing files automatically labeled
Before publishing an auto-classification policy, you will want to test how well your new policy works across your data environment. There are three main reasons for this:
- There is no guarantee that a well-developed auto-classification policy performs as expected. This is due to the unexpected variability in your environment
- Even if you are experienced in policy creation, you can inadvertently trigger false positive or false negative matches
- Deploying an incorrectly defined classification policy can result in a high number of help desk calls and incidents
To address this, we are also announcing the public preview of a capability called ‘Policy Simulator’ to assist you in validating and fine-tuning your auto-classification policies. Policy Simulator is designed to:
- Enable you to understand the impact of the policy and fine tune it for best accuracy and scalability
- Provide insights on the estimated length of time to deploy a policy at scale
- Add guardrails to prevent deployment of ineffective or bad policies and help minimize incident management costs
With Policy Simulator, you can validate and gain confidence in your policies prior to enforcement. You can publish your policies in successively broader scopes, thereby mitigating the risk of inadvertent consequences.

Figure 3. Overview of auto-classification policy simulator results
Auto-classification with sensitivity labels along with policy simulator are powerful capabilities that enable organizations to automatically designate eligible Excel, PowerPoint, Word files, and emails as sensitive in a scalable way.
To learn more about these new capabilities, including how they compares to auto-classification in Office apps for files in use, see our online documentation, “Apply a sensitivity label to content automatically”.
We are excited to roll out these capabilities and help you in your information protection journey.

Am a keen follower of Microsoft's SharePoint Blog and proud to provide this direct from the Microsoft Tech Community:
For organizations, finding and governing content is critical to improve productivity. Content metadata—also called properties, attributes, columns, terms or tags—is essential for information architecture, workflow, , and compliance. Managed Metadata Service (MMS) delivers centralized management of taxonomy (hierarchies of tags and terms) and content types. Today, MMS is used to provide a unified set of terms to apply to content in Microsoft 365.
As we prepare for the general release of Project Cortex later in 2020, our first step is to update the MMS in SharePoint. In April 2020, we’ll start to release the following enhancements to Targeted Release:
- A modern term management system in the SharePoint admin center.
- A modern content type gallery in the SharePoint admin center, to create and manage content types in the content type hub.
- An update to the tagging and filtering interface for MMS columns in lists and libraries.
Importantly, these features will require no migration or change to the data—terms or content types—in your existing MMS, but will unlock new capabilities for admins and information workers.
.
Managing taxonomies in the SharePoint admin center
You’ll find the new term manager in the Content services section of the SharePoint admin center, providing modern, integrated controls for the creation and management of organizational taxonomies and glossaries. You’ll be able to work with your preexisting global term sets and create new sets without reconfiguring your existing MMS Taxonomy. We’ve also increased the number of terms supported at a tenant level from 200,000 to 1,000,000.
Figure 1 – Modern taxonomy management
Content type gallery
You can now manage content types in the new content type gallery in the SharePoint admin center.
What’s a content type? Content types create a hierarchy of information categories that you can use to define templates, metadata and document processing rules.
The content type list allows you to group on different columns and save custom views. The content type gallery also streamlines the process of adding, removing or changing custom columns. The new gallery provides a centralized view over content types originally established in the original site-based content type hubs.
 Figure 2- Content Type Gallery
 Figure 3 – Managing content types
In SharePoint lists and libraries, an updated tree view makes it easier to tag and filter content with terms.
 Figure 4 – Managed metadata filtering
What’s next
We’ll have the product team available live to answer questions on MMS during the Project Cortex Office Hours call on May 20, 2020.
After the initial release of modern MMS experiences, we’ll be updating the site-based admin experiences to match the tenant admin interface. And we’ll have new APIs ready to empower custom development using Microsoft Graph and RESTful syntax.
Updating MMS will provide great value to SharePoint today, and MMS will be essential to delivering new premium value to Project Cortex later this year. Thank you.
The above is kindly provided by the Microsoft Tech Community!
Am a keen follower of Microsoft's SharePoint Blog and proud to provide this direct from the Microsoft Tech Community:
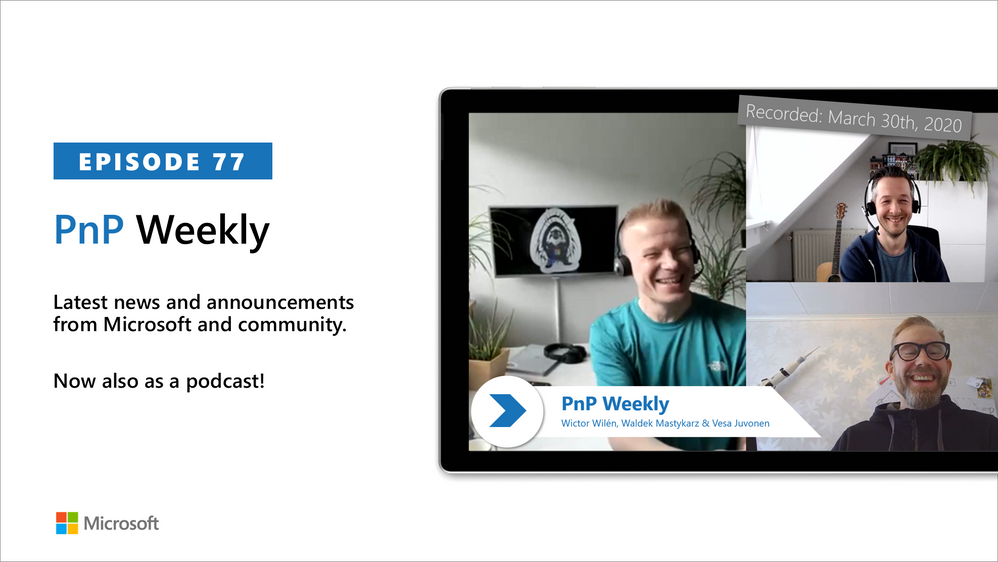
In this weekly discussion of latest news and topics around Microsoft 365, hosts – Vesa Juvonen (Microsoft), Waldek Mastykarz (Rencore), are joined by Wictor Wilén – global innovation lead for modern workplace at Avanade, SharePoint MVP for 10 years, SP Master, SP Certified Architect and creator of Yo Teams, to learn more about his increased focus on Microsoft Teams extensibility.
For Wictor, his latest work is in no way a departure from SharePoint rather as Azure and Microsoft 365 capabilities are working hand-in-hand, Teams opens new doors to add onto SharePoint. The group discusses the differences between developing apps for Teams vs for SharePoint. As well as differences between the requirements of knowledge workers vs first line workers – who are keenly interested in actionable apps.
The attraction of the Teams platform is wide access to a host of complementary capabilities – bots, conversations, integrations, content store, chat, video, phone all tied together by Microsoft Graph and Azure Active Directory. Teams was built to be extensible. Architects – are you designing apps for the remote work future in which we are finding ourselves today?
This episode was recorded on Monday, March 30, 2020
Got feedback, ideas, other input – please do let us know!
The above is kindly provided by the Microsoft Tech Community!
Am a keen follower of Microsoft's SharePoint Blog and proud to provide this direct from the Microsoft Tech Community:
Change agents, from virus outbreaks like COVID-19 to unexpected weather emergencies, highlight the importance of establishing and keeping open the lines of communication. The goal: to ensure everyone stays briefed on the situation and any business impacts.
To address crises, meetings move online, daily guidance email updates get sent, and dedicated sites emerge to consolidate news, related resources and topical Q&A.
This ‘how to’ post addresses the latter, to guide you through simple steps and configuration to establish a crisis management site based on a SharePoint communication site. You, too, will also find additional links to helpful guides and videos at the end.
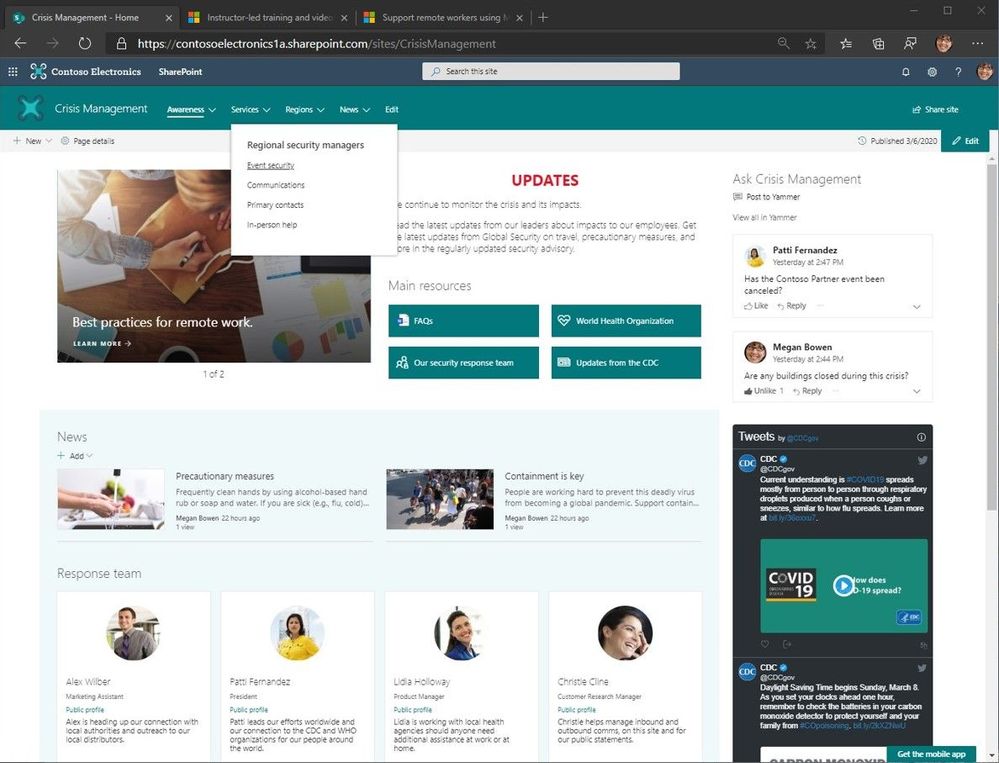
“Crisis Management” SharePoint communication site with top navigation and seven web parts laid out to provide access to people and information from inside and outside the organization.
Note: tenant admins can provision a pre-configured crisis management site using this new look book design: “Crisis Communications – announcements, news, resources, communities and calls-to-action.” Kudos and thanks to & .
How to create a crisis management site
Beyond reading this blog, getting from concept to live site should take no more than two hours. And before you commit to a single pixel, we suggest you take a few minutes to draft a wireframe of the site to identify desired content and information placement; this is what you see as #1 in the below four-image graphic; this, too, will start to describe what SharePoint web parts you will need.
Back of the napkin, check. Let’s get to it.
Create the site
- Go to your SharePoint start page
- Note: Use this common URL pattern to go right to it, or click the SharePoint tile within the Office 365 app launcher (aka, the waffle in the upper left of Office 365 user interface): https://[yourcompany].sharepoint.com/_layouts/15/sharepoint.aspx
- Click + Create site
- Choose Communication site [Support article: “Create a communication site in SharePoint Online“]
- Note: This is what you see as #2 in the below four-image graphic.
- Choose the Topic design, enter site name, and click Finish.
- Note: You’ll then see your new communication site with placeholder content. This is what you see as #3 in the below four-image graphic.
 Create the SharePoint communication site in four steps: 1) draw wire frame content layout plan, 2) create the site from SharePoint start page, 3) edit and rearrange text, words, links, sections, layouts off of template, and 4) finalize design, content and permissions.
Note: if you are unable to create sites within your Office 365 tenant, send a request to your SharePoint admin to create the site and assign you as a site owner. Once created and assigned, you can move to the next steps described in this post.
Adjust section layouts and add useful web parts
From here, it’s all about actualizing your wire frame; if it has a coffee stain on it by now – that just adds character. It’s now time to add sections, select useful web parts and content layout.
On the new crisis management site, click the highlighted Edit button. Hover your mouse below the title area and you’ll see a “+” appear: this applies to both section layouts (the “+” sign appears when hovering near the left side of the page) and when adding web parts (the “+” sign appears more in the middle of the page, and then under each added web part).
 Hover near the left side of the page makes the “+” sign appear to add section layouts.
 Hover more in the center of the page to make the “+” sign appear to add web parts.
Click + to add content like text, documents, video and more; learn more about how to find and use web parts & add sections and columns.
Now, make the site useful and actionable.
Add your content, and update it any time
In the above example crisis management site (first larger graphic in this post and #4 in the above four-image graphic), it uses top navigation (mega menu), a two-column section above a single column section – all to the left of a vertically laid out section, and a total of seven web parts.
Going left-to-right, top-down, the crisis management site uses the following web parts:
- Hero – use this to highlight the most important, or newest, content on the site. The one in the example uses the carousel layout.
- Text – use the rich-text editor to add and update the main intent of the site, or an important message. You can use and adjust color, font size, hyperlink and tables.
- Quick links – call out primary resources. These can be internal sites, pages, documents, videos, FAQs, and can be external links, too.
- Yammer Conversations – create an associated “Crisis Management” community and take questions and manage feedback directly from the site.
- News – publish daily and weekly news posts. They will appear here on the site and flow into everyone SharePoint start page where News from sites appear.
- Twitter – pull in feeds from public Twitter handles; the above example (per COVID-19) highlights @CDCgov and I also suggest: @CDCemergency & @WHO.
- People – indicate the right people dedicated to the specific crisis. This is tied to Azure Active Directory and on-hover, visitors of the site will be able to see all their contact information.
There, too, are web parts to showcase videos, BI dashboards, lists and more; see all web parts in production (scroll down to the “Available web parts” section of this help article).
You can adjust content at any time. You can rearrange where content is placed – aka, drag’n’drop web parts as you need. And know that everything will look great across web and mobile, resizing to the screen your people are using to get to the information.
Categorize top navigation with important pages, sites and more
Mega menus enable site navigation to be displayed at-a-glance. This increases the ease of use and exposure of more key content. You can put up to three levels of hierarchy, both enabling visual buckets of information and increases the likelihood of resources being discovered.
 SharePoint mega menus enable site navigation to be displayed at-a-glance.
Click Edit to the right of the default navigation elements to begin to add, adjust, delete and rearrange nav items. To Add a new header or sub-link, hover above header labels and select the + icon that will appear. To Edit, Move, Promote, and Remove select the ellipses next to the menu topic. Move and Promote headers and sub-links until they are in the desired position and select Save. Once you’ve arranged the hierarchy that works, click the upper right gear icon (site settings) and select Change the look. Select Mega menu and then select Save.
Make the top nav work for you. Make it your own. Learn more how to create and adjust a mega menu in SharePoint communication sites.
Last step: Share your site, aka, give the right permissions
You set permissions to grant people access to the site. And you can broadly communicate to raise awareness about the new crisis management site.
Above the site, in the upper right, you’ll see a gear icon. Click it, select Site permissions, and then click Share site. Now you can type in broader security groups, Office 365 Groups or individuals (possibly others to help you manage the site; give them Edit permissions). For a site like this, it’s common to use the “Everyone” or “Everyone except external users” and ensure they are given Read permissions so that the most users in your organization can access the site in the right way once it’s ready; this then denotes them as Site visitors. Note: I typically uncheck the “Send email” option and rather use Outlook or Yammer to broadly communicate or Teams chat to raise awareness to my teams. Once you’ve decided on the right
 Share the site to give permissions to all or select users and groups you wish to have access to the new site.
Learn more how to manage site permissions.
OK, on to additional materials out there to help best assess, learn and move forward.
‘How to’ webinar [now on-demand; embedded below]
Title: SharePoint: how to build a crisis management site
Description: This ‘how to’ webinar walks you through how to establish a *crisis management* site using a SharePoint communication site in Office 365, both manually and with a pre-configured site design from the Microsoft Look Book.
Date of recording: March 27, 2020
Webinar PowerPoint presentation: PDF
Two of the FAQs from the webinar that were not yet covered in this blog post:
Q: Is it possible to create multiple crisis managements sites within the same tenant?
A: Yes. You can create multiple crisis management type sites so long as you use different names for each site; aka, unique URLs.
Q: I want to create a portal for external people. Is that possible?
A: Yes. Make sure to work with your SharePoint administrator to help enable external sharing for the new site, inline with your external user governance plan before inviting guests.
Helpful, related reads and resources
Stay safe out there, wash your hands (Thanks, ellentube), and be kind to your neighbor at work and at home. Create your site. Share what you know and ask about what you don’t.
We’re here to help,
Mark Kashman, senior product manager – Microsoft
The above is kindly provided by the Microsoft Tech Community!

This blog post will address the enterprise IT admin’s challenge on how to deploy Office 365 ProPlus to remote workers without saturating the company’s VPN connections. It will show you how to implement a tactical approach which allows an IT admin to stay in control and quickly relief the pain of VPN congestion by offloading content distribution to the Microsoft Content Delivery Network (CDN). Maybe you are in the process of moving off legacy versions of Office and want to keep the pace with e.g. the Office 2010 end-of-support approaching fast. There are multiple strategic solutions available (e.g. Intune and Windows Autopilot), but for now we focus on a quick fix.
Overview of blog post series
This blog post is part of a three-part series, which is brought to you by the ProPlus Rangers at Microsoft, a group of most senior deployment experts. The series provides guidance on how to offload content distribution to the Microsoft CDN across the lifecycle of an Office 365 ProPlus installation:
We hope this will help you to minimize the impact of deploying, servicing and managing Office 365 ProPlus on your own network and your user’s VPN connections.
The Concept
With the approach described below, we want to achieve two things:
- Keep IT admins in control what happens when by continue using your enterprise management solution like Microsoft Endpoint Configuration Manager (formally known as System Center Configuration Manager (SCCM))
- Offloading the content distribution to Microsoft’s CDN to allow remote user to leverage their local internet connection instead of pulling large source files from your ConfigMgr Distribution Points over VPN connections
We will walk you through the process on how to adjust an existing Office 365 ProPlus deployment package for a hybrid approach, update your sources and ensure that the source file download will bypass your VPN.
Step 1 – Adjust your deployment package
To allow remote users to leverage their local internet connection for source file access, we have to remove the source files from the Configuration Manager application. Navigate to the folder which is holding your software sources, locate the “office” folder and delete it:

In the above example, 11 Language Packs were included in the deployment package, bumping the size up to 6+ gigabytes. Keep the setup.exe as well as any configuration files located in the folder. This reduces the size of your deployment package to less than 10 megabyte. That’s a huge saving on your VPN connections.
In case you don’t have an Office 365 ProPlus installation package yet, you can use the built-in wizard to create one. Maybe you want to adjust the handling of languages, instead of hard-coding those you might want to use MatchOS or MatchPreviousMSI. After that, apply the steps above.
Step 2 – Update the content sources
If your application was already synced to Distribution Points, those still have the larger package cached. Navigate to Software Library > Application Management > Applications, select your application, switch to the Deployment Types Tab, right-click the appropriate entry and click Update Content.

This will re-sync any changes to your Distribution Points, so those will now also have the smaller deployment package ready to sync to devices.
Step 3 – Verify VPN configuration and deploy
Once a client has received the smaller deployment package through ConfigMgr and kicks off the installation, it will download the source files directly from the Microsoft CDN. It is important to ensure that your devices can actually reach out to those endpoints directly and don’t backhaul through the VPN tunnel. We published guidance on how to enable so-called VPN split-tunneling, the endpoints relevant for Office 365 ProPlus source file download are listed at Office 365 URLs and IP address ranges as entry #92.
If you already have an active deployment of the newly-updated package, clients will start receiving it after the Distribution Points have finished syncing the changes. If you want to start with a fresh deployment, just follow the regular guidelines in your organization.
FAQ
Q: We usually controlled which build is installed by embedding the matching source files. How can I control this now?
A: By default, setup will fetch the latest build available for the specified update channel. You can use the version attribute in the configuration file to specify a build. This might be important if your organization is wants to deploy the older SAC feature release.
The Authors
This blog post is brought to you by from the Office 365 ProPlus Ranger Team at Microsoft. Feel free to share your questions and feedback in the comments below.

Over the past few weeks, Microsoft, and more specifically the Office 365 Network team have seen a large influx of questions from customers around how best to optimize their Office 365 connectivity as they work diligently to plan for a large amount of their userbase suddenly working from home. We’ve also seen similar queries from customers looking for best practice whilst rapidly enabling their Office 365 benefits, Free Teams plans or free 6 month E1 trial recently announced to rapidly roll out Teams to allow their business to continue to function and allow users to collaborate effectively without being in the Office.
The recent COVID-19/Coronavirus outbreak has caused many customers to rapidly enable, or proactively plan for the bulk of their employees working from home. This sudden switch of connectivity model for the majority of users typically has a significant impact on the corporate network infrastructure which may have been scaled and designed before any major cloud service was rolled out and in some cases, not designed for a situation when it is required simultaneously by all users.
Network elements such as VPN concentrators, central network egress equipment such as proxies, DLP etc, central internet bandwidth, backhaul MPLS circuits, NAT capability and so on are suddenly put under enormous strain due to the load of the entire business using them, with the end result being poor performance and productivity coupled with a poor user experience for those users forced to adapt to working from home.
A simple diagram of a traditional network model can be seen below, where remote user’s connectivity is forced in and back out of the corporate network to reach critical resources as well as branch offices using MPLS circuits to reach the services offered at head office. It is an incredibly common network model for businesses around the world, but it was designed to be effective for a pre-cloud world.
 A traditional enterprise network, which does not work well in a cloud first world
This model made perfect sense and worked very well when the bulk of applications, data and services resided within the corporate network (the dotted line in the diagram), but as enterprises shift to the cloud, it rapidly becomes a cumbersome environment which doesn’t scale well or provide the organization with any agility to react to situations such as that we face today. Many customers report to Microsoft that they have seen a very rapid shift of network traffic which used to be contained within the corpnet now almost exclusively connecting to some external cloud-based source.
Fortunately, Microsoft has been working closely with customers and the wider industry for many years to provide effective, modern solutions to these problems from within our own services, and also aligned to industry best practice. Solutions that apply very simply and effectively to remote workers as much as they do to branch offices. Microsoft has designed the connectivity requirements for the Office 365 service to work efficiently for remote users whilst still allowing an organization to maintain security and control over their connectivity.
Below we will outline the simple steps an organization can take to drastically reduce the impact Office 365 traffic has on the traditional corporate infrastructure when we have a large percentage of users working remotely all at once. The solution will also have a significant impact on user performance and also provide the benefit of freeing up the corporate resources for elements which still have to rely on it.
Most remote users who are not using a virtualized desktop will use a VPN solution of some sort to route all connectivity back into the corporate environment where it is then routed out to Office 365, often through an on premises security stack which is generally designed for web browsing.
The key to this solution is separating out the critical Office 365 traffic which is both latency sensitive and that which also puts enormous load on the traditional network architecture. We then treat this traffic differently and use the user’s local internet connection to route the connectivity directly to the service. To do this we need to follow a simple set of actions:
1. Identify the endpoints we need to Optimize
Microsoft has already identified these endpoints and marks them very clearly for reference. In the URL/IP list for the service these endpoints are marked as “Optimize”. There are just four URLS which need to be optimized and nineteen IP subnets. In just this small group of endpoints we can account for around 80% of the volume of traffic to the service and it also includes the latency sensitive endpoints such as those for Teams media. Essentially this is the traffic that we need to take special care of and is also the traffic which will put incredible pressure on traditional network paths.
URLs in this category have the following characteristics:
- Are Microsoft owned and managed endpoints hosted on Microsoft infrastructure.
- Have IPs provided
- Low rate of change to URLs/IPs compare to other two categories
- Expected to remain low in number of URLs
- Are High volume and/or latency sensitive
You can also query the REST API Web Service for this information, and a PowerShell example script which does this and outputs the URLs/IPs/Ports for all three endpoint categories can be found using the link above.
|
Endpoint to Optimize
|
Port/s
|
Use
|
|
https://outlook.office365.com
|
TCP 443
|
This is one of the Core URLs Outlook uses to connect to its Exchange Online server and has high volume of bandwidth usage and connection count. Low network latency is required for online features including: Instant search, Other mailbox calendars, Free / busy lookup, manage rules & alerts, Exchange online archive, Emails departing the outbox.
|
|
https://outlook.office.com
|
TCP 443
|
This is use for Outlook Online web access to connect to its Exchange Online server and network latency. Connectivity is particularly required for large file upload and download with SharePoint Online.
|
|
https://.sharepoint.com
|
TCP 443
|
This is the primary URL for SharePoint Online and has high volume of bandwidth usage.
|
|
https://-my.sharepoint.com
|
TCP 443
|
This is the primary URL for OneDrive for Business and has high volume of bandwidth and possibly high connection count from the OneDrive for Business Sync tool.
|
|
Teams Media IPs (no URL)
|
UDP 3478, 3479, 3480, and 3481
|
Relay Discovery allocation and real time traffic (3478), Audio (3479), Video (3480), and Video Screen Sharing (3481). These are the endpoints used for Skype for Business and Microsoft Teams Media traffic (Calls, meetings etc). Most endpoints are provided when the Microsoft Teams client establishes a call (and are contained within the required IPs listed for the service).
UDP is required for optimal media quality.
|
should be replaced with your Office 365 tenant name. For example contoso.onmicrosoft.com would use contoso.sharepoint.com and constoso-my.sharepoint.com
At the time of writing the IP ranges which these endpoints correspond to are as follows. It is strongly advised you use the script referenced previously or the URL/IP page to check for any updates when applying the policy, and do so on a regular basis.
104.146.128.0/17
13.107.128.0/22
13.107.136.0/22
13.107.18.10/31
13.107.6.152/31
13.107.64.0/18
131.253.33.215/32
132.245.0.0/16
150.171.32.0/22
150.171.40.0/22
191.234.140.0/22
204.79.197.215/32
23.103.160.0/20
40.104.0.0/15
40.108.128.0/17
40.96.0.0/13
52.104.0.0/14
52.112.0.0/14
52.96.0.0/14
52.120.0.0/14

- TCP ports 80/443
- UDP ports 3478, 3479, 3480, 3481
IPV6 endpoints can be ignored if not currently required, i.e. the service will currently operate successfully on IPV4 only (but not the other way round). This will likely change in future but IPV4 only is possible for the time being.
2. Optimize access to these endpoints via the VPN
Now that we have identified these critical endpoints, we need to divert them away from the VPN tunnel and allow them to use the user’s internet connection to connect directly to the service. The vast majority of VPN solutions allow split tunnelling, where identified traffic is not sent down the VPN tunnel to the corporate network but rather sent direct out the user’s local internet connection. The VPN client should be configured so that traffic to the above, Optimize marked URLs/IPs/Ports are routed in this way. This allows the traffic to utilize local Microsoft resources such as Office 365 Service Front Doors such as AFD as one example, which deliver Office 365 services & connectivity points as close to your users as possible. This allows us to deliver extremely high performance levels to users wherever they are in the world. There is also Microsoft’s world class global network which is very likely within a small number of milliseconds of your users direct egress, and is designed to take your traffic securely to Microsoft resources wherever they may be in the world, as efficiently as possible.
The solution would look something like that below.
 A client’s VPN connection with split tunneling enabled
Sounds simple? It is in most cases, but for an enterprise, this shift in connectivity invariably raises questions about security. In the traditional network approach security is often applied inline to network traffic as it egresses to the internet. Proxies and firewalls perform inspection on the traffic to check for data exfiltration, viruses and so on. By bypassing this we are removing this layer of protection we have come to rely on when connecting to the internet. The good news is, for the highlighted endpoints above, Microsoft has numerous features in place which means your security with the modern approach may well be higher than available previously. We will run through some of the common solutions below, not all will be relevant or necessary to all customers, but we will cover the majority of common concerns that come up when implementing modern network connectivity.
3. Common questions when implementing local breakout and split tunnelling for Office 365
It should be noted that the two steps above are all that is necessary to solve the performance/scalability issues if you need to move very quickly given the current situation. The elements below can be added as needed and as time allows or you may have them in place already.
Q1. How do I stop users accessing other tenants I do not trust where they could exfiltrate data?
A: The answer is a feature called tenant restrictions. Authentication traffic is not high volume nor especially latency sensitive so can be sent through the VPN solution to the on-premises proxy where the feature is applied. An allow list of trusted tenants is maintained here and if the client attempts to obtain a token to a tenant which is not trusted, the proxy simply denies the request. If the tenant is trusted, then a token is accessible if the user has the right credentials and rights.
So even though a user can make a TCP/UDP connection to the Optimize marked endpoints above, without a valid token to access the tenant in question, they simply cannot login and access/move any data.
Q2. Does this model allow access to consumer services such as personal OneDrive accounts?
A: No, it does not, the Office 365 endpoints are not the same as the consumer services (Onedrive.live.com as an example) so the split tunnel will not allow a user to directly access consumer services. Traffic to consumer endpoints will continue to use the VPN tunnel and existing policies will continue to apply.
Q3. How do I apply DLP and protect my sensitive data when the traffic no longer flows through my on-premises solution?
A: If required, endpoints can be protected with Office DLP if required and it’s much more efficient to provide this feature in the service itself rather than try and do it in line at the network edge. Azure Information protection can also be used to provide a high level of information protection if required.
Q4. How do I evaluate and maintain control of the user’s authentication when they are connecting directly?
A: In addition to the tenant restrictions feature noted in Q1, conditional access policies can be applied to dynamically assess the risk of an authentication request and react appropriately. Microsoft recommends the Zero Trust model is implemented over time and we can use Azure AD conditional access policies to maintain control in a mobile & cloud first world. Conditional access policies can be used to make a real-time decision on whether an authentication request is successful based on numerous factors such as:
- Device, is the device known/trusted/Domain joined?
- IP – is the authentication request coming from a known corporate IP address? Or from a country we do not trust?
- Application – Is the user authorized to use this application?
We can then trigger policy such as approve, trigger MFA or block authentication based on these policies.
Q5. How do I protect against viruses and malware?
A: Again, Office 365 provides protection for the Optimize marked endpoints in various layers in the service itself, outlined in this document. As noted, it is vastly more efficient to provide these security elements in the service itself rather than try and do it in line with devices which may not fully understand the protocols/traffic.
For the Exchange endpoints listed above, Exchange Online Protection and Office 365 Advanced Threat Protection do an excellent job of providing security of the traffic to the service.
Q6. Can I send more than just the Optimize traffic direct?
A. Priority should be given to the Optimize marked endpoints as these will give maximum benefit for a low level of work. However, if you wish, the Allow marked endpoints are required for the service to work and have IPs provided for the endpoints which can be used if required.
There are also various vendors who offer cloud based proxy/security solutions called secure web gateways which provide central security, control and corporate policy application for general web browsing. These solutions can work well in a cloud first world, if highly available, performant, and provisioned close to your users by allowing secure internet access to be delivered from a cloud based location close to the user. This removes the need for a hairpin through the VPN/corporate network for general browsing traffic, whilst still allowing central security control.
Even with these solutions in place however, Microsoft still strongly recommends the Optimize marked Office 365 traffic is sent direct to the service.
Q7. Why is port 80 required? Is traffic sent in the clear?
A. Port 80 is only used for things like redirect to a port 443 session, no customer data is sent or is accessible over port 80. This article outlines encryption for data in transit, and at rest for Office 365 and this article outlines how we use SRTP to protect Teams media traffic.
Q8. Does this advice apply to users in China using a worldwide instance of Office 365?
A. No it does not. The one caveat to the above advice is users in the PRC who are connecting to a worldwide instance of Office 365. Due to the common occurrence of cross border network congestion in the region, direct internet egress performance can be variable. Most customers in the region operate using a VPN to bring the traffic into the corporate network and utilize their authorized MPLS circuit or similar to egress outside the country via an optimized path. This is outlined further in this article https://docs.microsoft.com/en-us/office365/enterprise/office-365-networking-china
Finally, please ask any questions you may have in the comments section below and we will do our best to answer as quickly as possible.
4. Further reading
General best practice for Office 365 connectivity:
http://aka.ms/pnc
https://docs.microsoft.com/en-us/archive/blogs/onthewire/__guidance
Recorded Ignite sessions
https://myignite.techcommunity.microsoft.com/sessions/81561?source=sessions
https://myignite.techcommunity.microsoft.com/videos/64276
https://myignite.techcommunity.microsoft.com/videos/64275
Office 365 Partner Program
https://resources.techcommunity.microsoft.com/networking/
Current partners are Citrix, Netfoundry, NTT, SilverPeak and Zscaler
Network Connectivity performance testing
https://connectivity.office.com/
This tool runs some tests against Office 365 endpoints including the Optimize marked ones and give you some clear feedback around how connectivity looks for those endpoints and anything you can do to improve the connectivity.
Bandwidth planning
https://aka.ms/bandwidth/
This tool is one mechanism you can use to monitor user’s Office 365 network traffic volumes to get a clear figure for bandwidth requirements for the wider business.


