
Due to the dynamic situation with COVID-19 many IT pros are being challenged to assess ways to configure Office 365 Client to update directly from Microsoft CDN. Today, the majority of customers I engage with manage updates using Configuration Manager (ConfigMgr), predominately on-premises. The objective of this posting is how to minimize internet egress through customer VPN network for Office updates.
Network considerations
There are an infinite number of ways customers configure network access, no two customers are identical in configuration. Speaking generally, the VPN client needs to support split tunneling or be configured so network traffic destined for Office 365 are directed to internet and are not required to pass through VPN Server. Microsoft provides a list of all Office 365 URLs and IP address ranges in the following document. Some customers have VPN clients dynamically aware of Office 365 Services using Microsoft Graph API, some support URLs and others only support IP exclusions. You’ll notice item(s) 90 and 92 which provide specific URLs used by the Office 365 Client to perform updates.
|
90
|
Default
Required
|
mrodevicemgr.officeapps.live.com (Description: Device Management Service (DMS) is used to advertise the C2R builds to the machines which are non-admin managed based on the meta data passed by the machine.)
|
TCP: 443
|
|
92
|
Default
Required
|
officecdn.microsoft.com, officecdn.microsoft.com.edgesuite.net (Description: Office CDN where content is downloaded)
|
TCP: 443, 80
|
Tip: Please review blog posting How to quickly optimize Office 365 traffic for remote staff & reduce the load on your infrastructure
Tip: Please review blog posting Managing remote machines with cloud management gateway in Microsoft Endpoint Configuration Manager
Background on how Office 365 Client works by default
Office 365 ProPlus is designed by default to update from CDN. A scheduled task called “Office Automatic Updates 2.0” uses a trigger to routinely check for updates as advertised by DMS service. The Office client will always move to the latest versionbuild available by assigned channel documented here. Documentation around what to expect from a user experience when updates are delivered from CDN can be found here. If ConfigMgr Office 365 Client Management integration is enabled by Configuration.xml during initial installation, ConfigMgr Client settings, or Domain Policy, the scheduled task will continue to execute but will only perform software updates from ConfigMgr.
Options available to update from CDN
Option 1: Cloud managed
Steps:
- Disable OfficeMgmtCOM (required if previously ConfigMgr managed)
- On the next restart of Microsoft Office Click-to-Run Service, Office COM application will de-registered. Allows Office Client to do its thing and get updates from the CDN.
- This can be done by changing client settings in ConfigMgr or by Group Policy.
- Set UpdatesEnabled GPO to True (optional)
- Allows the client to resume normal update checks from the CDN
- UpdateDeadline GPO as an integer (optional) in days (ex. 12) to ensure the client is updated to ensure compliance. Using an integer value allows the admin to not have to continually change the date to a future date/time for every update.
Option 2: SCCM managed but offload content distribution
Use normal deploy software updates wizard within ConfigMgr console selecting deploy option. When completing deployment package screen, it is important to select option “No deployment package”. In this way, clients will download content directly from CDN but keep existing controls and user experience during software update workflow.
Steps:


FAQ:
How can I verify ConfigMgr integration is disabled?
Start -> Run ->dcomcnfg.exe and look for presence of OfficeC2Rcom application.


Where in the Office logs can I confirm Office updates are coming from CDN?
Use http://aka.ms/office365logcollector to collect Office logs or search for files in C:windowstemp which have your NetBIOS name like MININT-314VFT4-20200318-0857.log. (There will be a bunch of them). Use your favorite text editor to search for strings like ‘officecdn.microsoft.com’ or the build number you deployed.
Starting with version 1902, ‘Prefer cloud based sources over on-premise sources’ allows IT Pro to prioritize Cloud content. Does this feature extendsupport Office 365 Client updates?
No, this appear to be a bug which is under investigation. Workaround is to ensure Distribution Points used by VPN clients do not host Office 365 Client updates resulting in error 404. If the software deployment has selection ‘If software updates are not available on distribution point in current, neighbor or site boundary groups, download content from Microsoft Updates’, this should allow new location of CDN fallback to be used. I will update this item with updates when available.
The Authors
This blog post is brought to you by Dave Guenthner and Martin Nothnagel, two ProPlus Rangers at Microsoft. We’re looking forward to your questions and feedback in the comments below.
Am a keen follower of Microsoft's SharePoint Blog and proud to provide this direct from the Microsoft Tech Community:
In this session of PnP Weekly, hosts – Vesa Juvonen (Microsoft), Waldek Mastykarz (Rencore), and typically a special guest from the PnP Community, discuss the latest news and topics around Microsoft 365 development. This week, Vesa and Waldek are joined by Brett Lonsdale – Office Apps and Services MVP, owner of UK based Lightning Tools developing “gap filler” products like BDC Meta Man and Lightning Conductor for the Microsoft 365 Suite.
Topics of discussion included:
- Decreasing time between release and adoption
- Improved product use experience as a result of adopting SPFx
- Building personal apps (including Social-Squared – discussion forum tool) for Microsoft Teams
- Using Microsoft Graph to connect with apps and data across the M365 suite.
This episode was recorded on Monday, March 23, 2020
Got feedback, ideas, other input – please do let us know!
The above is kindly provided by the Microsoft Tech Community!
With the announcement earlier this month that we plan to deprecate the AIP (classic) client and label management from the Azure Portal, customers are actively working to migrate their label management from the Azure Portal to the M365 Compliance portal.
This is the aim whether your plan for Windows clients is to use the Azure Information Protection (AIP) unified labeling client , or use the Microsoft Information Protection (MIP) features built-in to Office Pro Plus. This isn’t a concern For non-Windows platforms as they leverage the features built-in to our Office products.
As a recap, we discuss the strategic options for which client to use on Windows in our recent migrating to Unified Labeling webinar and the client comparison matrix in our Microsoft documentation.
After activating unified labeling one of the challenges your organization might have is the need to configure the localizations you had in AIP for MIP clients. The AIP CXE team has recently published a great blog post that can help you tackle this challenge. You can read the post here.
Thanks!
@Adam Bell on behalf of the MIP and Compliance CXE team

When installing Office 365 ProPlus using the Office Deployment Tool (ODT), the standard configuration includes the entire suite of applications by default. In some cases, IT Pros need to exclude one or more of the apps or add back previously excluded ones. The article will go over the various scenarios and provide guidance on how to implement them. These scenarios include:
- Exclude apps during initial install
- Remove specific apps after initial install
- Re-including apps that were previously removed
- Adding Visio and/or Project after initial ProPlus installation
So, let’s look at each of these scenarios:
Exclude apps during initial install
There are two main ways how admins can control which apps are excluded at the initial install of Office 365 ProPlus. First, using the Office Customization Tool (OCT) at https://config.office.com, admins can simply toggle the buttons for the apps they wish to exclude from the initial install:

This will craft the configuration file with the necessary exclusions for you. You can either export and save the file locally or to the cloud and reference this file during setup.
A second way that admins can control which apps are installed at the initial install of Office 365 ProPlus is to leverage the attribute in the ODT configuration file directly. The names of all the app values are as follows:
- ID=”Access”
- ID=”Excel”
- ID=”Groove” (This is the old sync client for on-Premises SharePoint)
- ID=”Lync” (Skype for Business)
- ID=”OneDrive”
- ID=”OneNote” (OneNote 2016, Win32 app. NOT the UWP Windows 10 app)
- ID=”Outlook”
- ID=”PowerPoint”
- ID=”Publisher”
- ID=”Teams”
- ID=”Word”
A sample configuration file with Groove and OneNote excluded from the install would look like this:
With either method at install time, Office 365 ProPlus will be installed with the selected apps excluded. You can verify by looking at this registry key:
HKEY_LOCAL_MACHINESOFTWAREMicrosoftOfficeClickToRunConfiguration
O365ProPlusRetail.ExcludedApps

Or simply by checking the start menu and noticing those applications are not present.
Remove specific apps after initial install
If Office 365 ProPlus is already installed on a device or devices and you need to remove one or more of the apps, you can use the same method as above. However, there are a couple things to keep in mind.
- You can use Version=”MatchInstalled” to eliminate the need to keep track of the Architecture and Servicing Channel as this attribute will read the existing values and honor them. This can cut down on the number of configuration files needed in environments with multiple Office 365 ProPlus configurations.
- Setup.exe and the configuration file will need access to the Office source files. Either from the Microsoft CDN (Recommended) or internally by including them in a Configuration Manager application. Click-to-Run Office does not cache source files like the MSI version did in the MSOCache location.

If you had previously excluded an app or apps at initial install time, and wish to keep them excluded, you must continue to exclude them via the section of the new configuration file you create along with whichever app or apps you now also want to exclude. Failure to do so will result in those applications being present and usable by your users.
The below example configuration file, leveraging “MatchInstalled” would remove Access from the device after initial install:
Like the warning pointed out, running the above configuration will result in Access excluded and ONLY ACCESS EXCLUDED. If you had previously excluded apps such as Groove or OneNote 2016 from your initial install and now wish to exclude Access while keeping Groove and OneNote 2016 also excluded, you must have all three applications called out like in this example:
Re-including apps that were previously removed
This is very similar to the above scenario. Since Office 365 ProPlus does not include or exclude applications in the traditional sense, but rather asks “what do you want the suite to look like after this configuration?” So therefore If you excluded an app at initial install or post install and now wish to add it back in, you will use a similar configuration to the above example leaving any other apps still excluded you want to remain that way.
Consider this scenario: The IT Pro excluded Access, Groove and OneNote 2016 at initial install and now wishes to add OneNote 2016 back into the suite but leave Access and Groove still excluded. The example configurations would look like this:
Initial install Configuration:
Second install Configuration:
Adding Visio and/or Project after initial ProPlus installation
Visio and Project operate in a different manner as they are different Product ID’s. These products cannot be added or excluded with the attribute. They can be added after the initial install by using a configuration file with Visio and/or Project as the value. You must match the servicing channel and version of Click to Run architecture (64/32-bit) to prevent making unwanted changes. Better yet, you can leverage the power of the CDN and the new attribute to do the heavy lifting here. Deploying Visio and/or Project from the Microsoft CDN after installing Office 365 ProPlus is very bandwidth friendly as most of the shared files are already installed.
Here is an example configuration of adding Visio and Project to device after Office 365 ProPlus has already been deployed:

Notice in the above example I have excluded Groove from both Product sections. Groove, OneDrive and Teams operate slightly different at install time and if not excluded from each product they will get installed along with Office 365 ProPlus, Visio and Project Click-to-Run.
The Author
This blog post is brought to you by Eric Wayne, a Sr. Office Deployment expert and ProPlus Ranger at Microsoft. Feel free to share your questions and feedback in the comments below.
Am a keen follower of Microsoft's SharePoint Blog and proud to provide this direct from the Microsoft Tech Community:
More of your employees are working remotely and depending on their mobile device for important company information. The current world climate and the concerns surrounding the COVID-19 virus have only amplified this need.
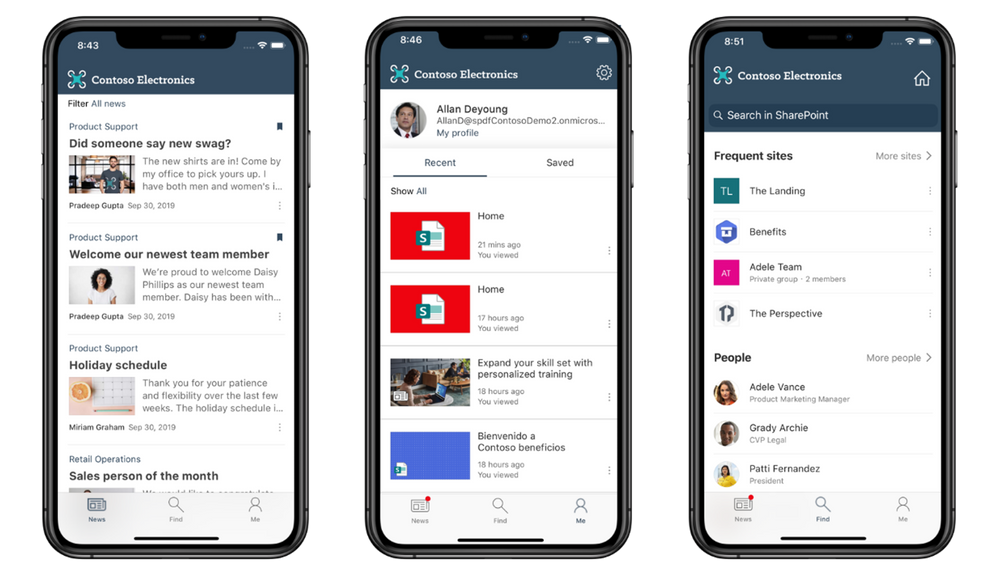
For many organizations their intranet is the hub for knowledge and information, and the SharePoint mobile app is the best way for employees to access this from any mobile device. A request we have heard from you is to allow the SharePoint mobile app to be more customizable and enable you brand it with your company’s guidelines easily. We are happy to announce that the SharePoint mobile app will now allow admins to customize their tenant theme in the Microsoft 365 admin center. The SharePoint mobile app will allow users to view their tenant theme on the app if admins have configured in on the Microsoft 365 admin center. This ability is available today for both iOS and Android devices.
Company branding with the SharePoint mobile app
For more information on how to customize your tenant them see Customize the Office 365 theme for your organization.
Administrators can configure the following for the SharePoint mobile app:
- Logo Image: Logo of SVG format (Images uploaded in any other format will not display in the app)
- Nav Bar Color: This is background color that appears in the background of the nav bar for all 3 tabs. (Please note sites will not be impacted by this nav bar color input).
- Text and Icon Color: This section input affects text and icons color on the navigation bar
- Accent Color: This input will affect buttons, links and other elements defined on the app for branding.
If you have already configured this information employee will automatically start seeing the branded app after they update the mobile app to latest version.
 Customize for your organization
Download or update the SharePoint mobile app from iOS and Android app store today to experience company branding.
The above is kindly provided by the Microsoft Tech Community!

This classification method is particularly well suited to content that isn’t easily identified by either the manual or automated pattern matching methods. This method of classification is more about training a classifier to identify an item based on what the item is, not by elements that are in the item (pattern matching). A classifier learns how to identify a type of content by looking at hundreds of examples of the content you’re interested in classifying

References:
This webinar was presented on Tue Mar 17th 2020, and the recording can be found here.
Attached to this post are:
- The FAQ document that summarizes the questions and answers that came up over the course of both Webinars; and
- A PDF copy of the presentation.
Thanks to those of you who participated during the two sessions and if you haven’t already, don’t forget to check out our resources available on the Tech Community.
Thanks!
@Adam Bell on behalf of the MIP and Compliance CXE team

Insider risk management is a solution in Microsoft 365 that helps minimize internal risks by enabling you to detect, investigate, and take action on risky activities in your organization.
Communication compliance is part of the new insider risk solution set in Microsoft 365 that helps minimize communication risks by helping you detect, capture, and take remediation actions for inappropriate messages in your organization.

References:
This webinar was presented on Tue Mar 10th 2020, and the recording can be found here.
Attached to this post are:
- The FAQ document that summarizes the questions and answers that came up over the course of both Webinars; and
- A PDF copy of the presentation.
Thanks to those of you who participated during the two sessions and if you haven’t already, don’t forget to check out our resources available on the Tech Community.
Thanks!
@Adam Bell on behalf of the MIP and Compliance CXE team
Am a keen follower of Microsoft's SharePoint Blog and proud to provide this direct from the Microsoft Tech Community:
This week, Vesa and Waldek are joined by Tracy van der Schyff – Microsoft Office 365 Service and Services MVP, learner, keynote speaker, story teller and blogger focused on explaining technology in simple terms, change management and adoption, residing in South Africa.
Did we mention: Tracy is a prolific blogger? Tracy’s idea of March Madness is 31 days of blogging about Power Platform. Then there is her Office 365 learning journey – 365 posts in 365 days. A full index of Tracy’s posts can be found here.
Tracy’s Quotes:
- “If you have to wait until you are an expert to share your learning journey, you would never have anything to say.”
- “People can learn from how you learn.”
- “Force yourself to learn everyday.”
- “Easier to teach a business person a tech skill than to teach a teckie a business process.”
- “Do things right even when doing small things. Because small projects can become large projects.”
- “Products don’t fix problems, people fix problems with products.”
- “Many people need to learn what we have already forgotten.”
- “Try and document”
This episode was recorded on Monday, March 16, 2020
Got feedback, ideas, other input – please do let us know!
The above is kindly provided by the Microsoft Tech Community!

As part of this preview, the Microsoft 365 Compliance Center will allow you to create sensitivity labels and corresponding automatic or recommended labeling policies in Office apps using built-in classifiers.
The six built-in classifiers that are available as part of this preview are:
- Resume: detects written accounts of an applicant’s personal, educational, and professional qualifications and experience
- Source code: detects a set of instructions and statements written in the top 25 computer programming languages of GitHub
- Offensive language: detects text items that contain profanities, slurs, taunts, and disguised expressions (expressions that have the same meaning as more offensive terms)
- Threat: detects a specific category of offensive language related to threat to commit violence or do physical harm/damage to a person/property.
- Harassment: detects a specific category of offensive language related to offensive conduct targeting one or multiple individuals regarding race, color, religion, national origin, gender, sexual orientation, age, disability and genetic information.
- Profanity: detects a specific category of offensive language that contains swear words or vulgar language.

References:
Thanks to those of you who participated in our previews so far. If you haven’t already, don’t forget to check out our preview programs page and our resources available on the Tech Community.
Thanks!
Written by @Nir Hendler , posted by @Adam Bell on behalf of the MIP and Compliance CXE team

Auto classification for Sensitivity labels in OneDrive for business, SharePoint, and Exchange Online helps you automatically label or tag content as sensitive to ensure the configured protections are applied.
Similar to manual labeling, an administrator can create sensitivity labels and policies to label content based on defined policies or rules. Auto classification varies from manual labeling in that the label occurs within the service, for example SharePoint Online, instead of the user labeling the content.
Additionally, before you publish an auto classification policy – wouldn’t it be great if you knew exactly what files and how many would be affected by your new configuration? This is where the new policy simulation feature will help. Before you enable a policy in your tenant, simulation mode allows you to validate your policy, and tune it further if the results are not quite as expected. The simulation can then be run again to check your update. You can rinse and repeat this process until you’re happy with the results. The ability to safely validate your approach without negatively impacting your environment and end users is critical and should help ease adoption.

References:
Thanks to those of you who participated in our previews so far. If you haven’t already, don’t forget to check out our preview programs page and our resources available on the Tech Community.
Thanks!
Written by @Nir Hendler , posted by @Adam Bell on behalf of the MIP and Compliance CXE team


